Installation guide for Windows
This guide provides installation and configuration instructions for Windows.
- Terminology
- Installation procedure
- Supported versions
- Installations
- Configuring DigDash after installation
This document describes how to install DigDash on Windows.
To install DigDash on Linux, please refer to the Installation guide for Linux.
To update an existing installation, please refer to the Upgrade Guide.
Terminology
Acronyms
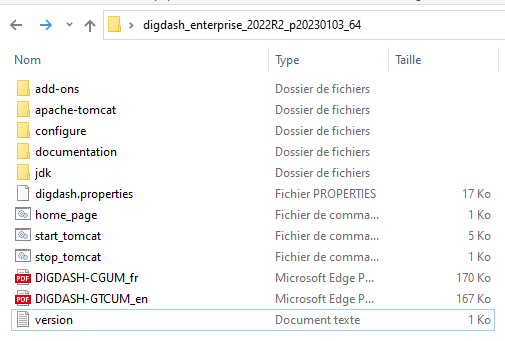
| Digdash | <DD Install> : folder ( example : digdash_enterprise_2022R2_p20230103_64) used for Digdash installation
|
OS | Operating System ( Windows, Ubuntu etc..) (about 20G) |
Data drive | E: In this documentation Partition or disk different from the system (size depends on the project) |
ROOT drive | C: In this documentation Partition or disk that hosts OS data |
Logs drive | L: Dans cette documentation Partition or disk which hosts the Log files (allocate a size of 5 G) ideally dedicated |
Installation procedure
List of modules outside of DigDash
All servers must have at least the following installations:
- File system
- Microsoft JDK 17
- Tomcat 9
- DigDash WebApps
List of production components:
- Replace ADSWRAPPER with OpenDJ (For production environments)
- Replace H2 with a Database: PostGres or MariaDB
List of optional components:
- Reverse Proxy: Apache for Windows
Supported versions
The following versions are supported :
- Tomcat 9 : last patch
- OpenDJ (recommended) : version 4.6.2 and later
- MariaDB : OS version or last patch of last LTS version
- Apache2 : last patch
Installations
Creating a file system
- Create a “logs” directory at the root of the desired directory (L):
- logs: hosts the log files of applications running on the server locally
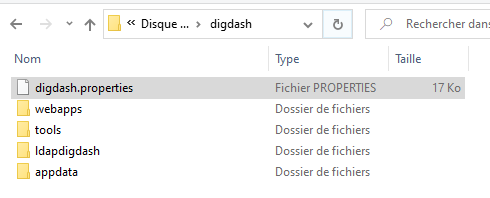
- Create a “digdash” directory at the root of E.
- In the digdash directory, create 4 directories:
- tools: hosts the tools delivered by DigDash which can interact with it (import tool, backup tools)
- webapps: DigDash application modules: (studio, adminconsole, dashboard, ddenterpriseapi)
- ldapdigdash: hosts LDAP configuration and data
- appdata: hosts DigDash data
- In each directory created in the previous steps, create a default directory.
- Copy the digdash.properties file to the root of the digdash directory of E:
Editing the digdash.properties file
- Open the digdash.properties file and add the following lines: :
# Log files location
ddenterpriseapi.ddlog4j.properties.file=E:/digdash/log4j2_api.properties
studio.ddlog4j.properties.file=E:/digdash/log4j2_studio.properties
digdash_dashboard.ddlog4j.properties.file=E:/digdash/log4j2_dash.properties
# Appadata location
ddenterpriseapi.AppDataPath=E:/digdash/appdata/default
digdash_dashboard.AppDataPath=E:/digdash/appdata/default
studio.AppDataPath=E:/digdash/appdata/default
adswrapper.ads.instance.name=E:/digdash/appdata/default/ldapdigdash
adminconsole.adminconsole_domain=adminconsole
adminconsole.webstudio_domain=studio
adminconsole.server_domain_list=ddenterpriseapi
adminconsole.dashboard_domain=digdash_dashboard
studio.DOMAIN=ddenterpriseapi
studio.FORCEDOMAIN=true
studio.SERVERURL=http://localhost:8080
studio.FORCESERVERURL=true
studio.adminconsole_domain=adminconsole
digdash_dashboard.DOMAIN=ddenterpriseapi
digdash_dashboard.FORCEDOMAIN=true
digdash_dashboard.SERVERURL=http://localhost:8080
digdash_dashboard.FORCESERVERURL=true
digdash_dashboard.adminconsole_domain=adminconsole
########### Nettoyage automatique des fichiers programmé
########### Scheduled automatic file cleaning
ddenterpriseapi.startCleaner=true
########### Nettoyage des fichiers inutilisés au démarrage du serveur
########### Clean up unused files on server startup
ddenterpriseapi.cleanOnStart=false
########### Sauvegarde automatique programmée
########### Scheduled automatic backup
ddenterpriseapi.autoBackup=true
ddenterpriseapi.autoBackupKeepDays=7
digdash_dashboard.CANCHANGEPASSWORD=true
########### Redirect address after logout
#ddenterpriseapi.urlLogout=http://localhost:8080
Creating log files at the root of the digdash directory :E
log4j2_api.properties
Create the log4j2_api.properties file at the root of the directory.
Copy the following code:
# Log files location
property.basePath = L:/logs
# webapp name
property.webAppName = ddenterpriseapi
# short webapp name
property.shortWebAppName = ddapi
# Definition of logger.app
logger.app.name = com.digdash
# Web application log level: trace, debug, info, warn, error, fatal
logger.app.level = debug
logger.app.additivity = false
# Definition of appender RollingFile
appender.rolling.type = RollingFile
appender.rolling.name = RollingFile
appender.rolling.fileName = ${basePath}/${webAppName}.log
appender.rolling.filePattern = ${basePath}/${webAppName}-%i.log.gz
appender.rolling.layout.type = PatternLayout
appender.rolling.layout.pattern = %d %-5p [${shortWebAppName}] [%t] (%F:%L) - %m%n
appender.rolling.policies.type = Policies
appender.rolling.policies.size.type = SizeBasedTriggeringPolicy
appender.rolling.policies.size.size = 200MB
appender.rolling.strategy.type = DefaultRolloverStrategy
appender.rolling.strategy.max = 15
# Linking logger.app to RollingFile appender
logger.app.appenderRef.rolling.ref = RollingFile
log4j2_dash.properties
Create the log4j2_dash.properties file at the root of the directory.
Copy the following code:
# Log files location
property.basePath = L:/logs
# webapp name
property.webAppName = dashboard
# short webapp name
property.shortWebAppName = dash
# Definition of logger.app
logger.app.name = com.digdash
# Webapplication log level : trace, debug, info, warn, error, fatal
logger.app.level = debug
logger.app.additivity = false
# Definition of appender RollingFile
appender.rolling.type = RollingFile
appender.rolling.name = RollingFile
appender.rolling.fileName = ${basePath}/${webAppName}.log
appender.rolling.filePattern = ${basePath}/${webAppName}-%i.log.gz
appender.rolling.layout.type = PatternLayout
appender.rolling.layout.pattern = %d %-5p [${shortWebAppName}] [%t] (%F:%L) - %m%n
appender.rolling.policies.type = Policies
appender.rolling.policies.size.type = SizeBasedTriggeringPolicy
appender.rolling.policies.size.size = 200MB
appender.rolling.strategy.type = DefaultRolloverStrategy
appender.rolling.strategy.max = 15
# Linking logger.app to appender RollingFile
logger.app.appenderRef.rolling.ref = RollingFile
log4j2_studio.properties
Create the log4j2_studio.properties file at the root of the directory.
Copy the following code:
# Log files location
property.basePath = L:/logs
# webapp name
property.webAppName = studio
# short webapp name
property.shortWebAppName = studio
# Definition of logger.app
logger.app.name = com.digdash
# Webapplication log level : trace, debug, info, warn, error, fatal
logger.app.level = debug
logger.app.additivity = false
# Definition of appender RollingFile
appender.rolling.type = RollingFile
appender.rolling.name = RollingFile
appender.rolling.fileName = ${basePath}/${webAppName}.log
appender.rolling.filePattern = ${basePath}/${webAppName}-%i.log.gz
appender.rolling.layout.type = PatternLayout
appender.rolling.layout.pattern = %d %-5p [${shortWebAppName}] [%t] (%F:%L) - %m%n
appender.rolling.policies.type = Policies
appender.rolling.policies.size.type = SizeBasedTriggeringPolicy
appender.rolling.policies.size.size = 200MB
appender.rolling.strategy.type = DefaultRolloverStrategy
appender.rolling.strategy.max = 15
# Linking logger.app to appender RollingFile
logger.app.appenderRef.rolling.ref = RollingFile
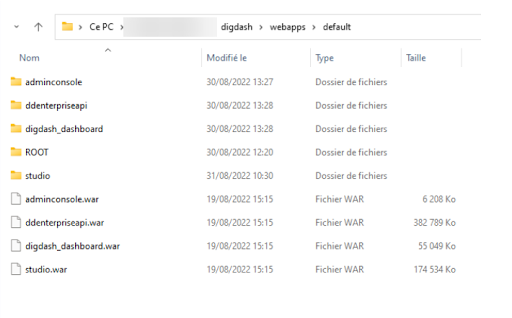
Deploying WebApps
Place the following (contained in the <DD Install>\apache-tomcat\webapps directory) in the E:/digdash/webapps/default folder:
- adminconsole.war
- ddenterpriseapi.war
- digdash_dashboard.war
- studio.war
- ROOT/ folder
Installing Microsoft JDK (optional if already installed)
- Download Microsoft JDK : https://docs.microsoft.com/fr-fr/java/openjdk/download or use the binary available in the installation Zip partenaire_installation_initial.zip.
- Start the installation.
Installing Tomcat 9
- Download TomCat 9 from https://tomcat.apache.org/download-90.cgi (Binary Distributions - > Core -> 32-bit/64-bit Windows Service Installer).
- Launch apache-tomcat-9.X.XX.exe.
- Accept the license agreement.
- In the Components list, select Tomcat (Service Startup & Native) and Start Menu Item.
- Leave the configuration settings at default.

- Enter the path to the installation of the openjdk installed in step 1.
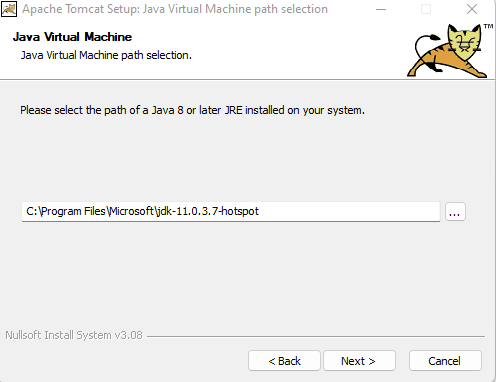
- Set the TomCat 9 installation directory.
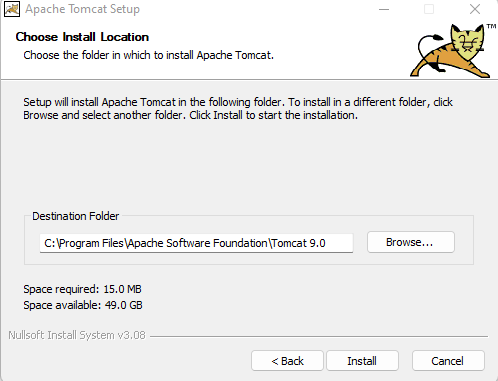
- Click Install to start TomCat 9 installation.
- Open page http://localhost:8080 to check TomCat is working properly.
- Open the TomCat 9 installation directory then the bin directory and launch tomcat9w.exe.
Modify the parameters contained in the Java tab :
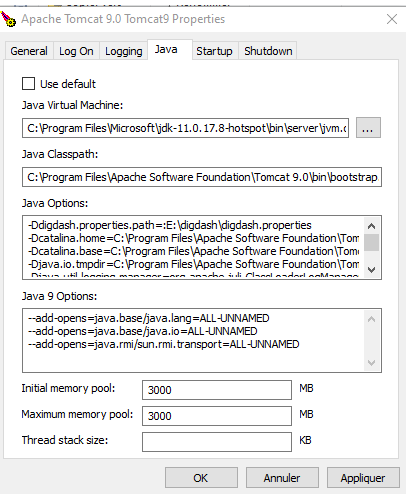 *
*- Adapt the paths to future digdash directories:
Ddigdash.properties.path=E:\digdash\digdash.properties
- To ensure that special characters are taken into account, add the parameter -Dfile.encoding=UTF-8 to the end of the JAVA_OPTS variable as below:
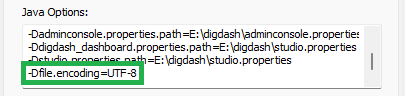
- Adapt the paths to future digdash directories:
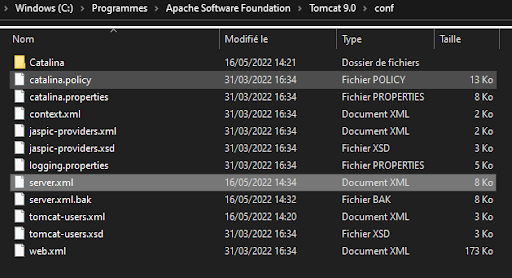
Editing the server.xml file
- Open the server.xml file located in the \Apache Software Foundation\Tomcat 9.0\conf directory.
connectionTimeout="20000"
maxConnections="30000"
maxCParametersCount="100000"
maxThreads="10000" maxPostSize="62914560"
redirectPort="8443" compression="on" />
- Change the path of the webapps to deploy.
unpackWARs="true" autoDeploy="true">
<Alias>digdash.client.com</Alias>
- Add the log valve and then, the securing valve.
<Valve className="org.apache.catalina.valves.RemoteIpValve"
internalProxies="127\.0\.[0-1]\.1"
remoteIpHeader="X-Forwarded-For"
requestAttributesEnabled="true"
protocolHeader="X-Forwarded-Proto"
protocolHeaderHttpsValue="https"/>
Editing the context.xml file
- Open the context.xml file located in the \Apache Software Foundation\Tomcat 9.0\conf directory.
- Add the following XML tag in the Context section:
Installing OpenDJ (recommended)
Initial setup
- Download the OpenDJ installation file (opendj-4.x.x.msi) from: https://github.com/OpenIdentityPlatform/OpenDJ/releases
- Start the installation by double-clicking the opendj-4.x.x.msi file.
- Keep the default location for the installtion directory : (C:/Program Files (x86)/opendj).
- Open the installation directory C:/Program Files (x86)/opendj) and run the “setup.bat” as administrator.
- Complete the Server settings and make sure to save the password entered.
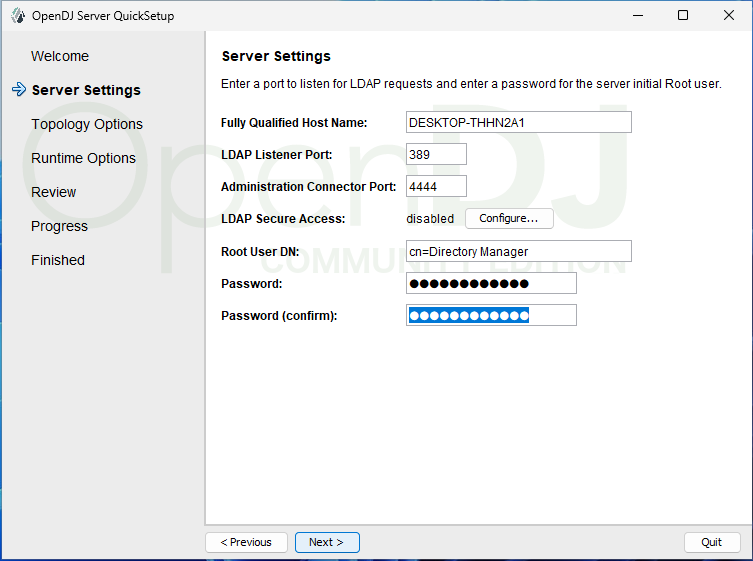
- In the Topology Options tab, leave the default option This will be a stand alone server.

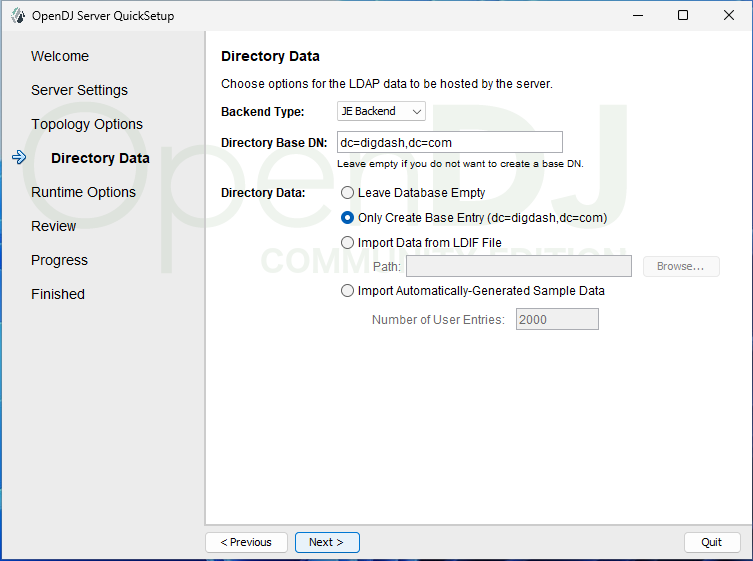
- Fill in the Directory Data and select Only Create Base entry (dc=digdash,dc=com).
- In the Review tab, check the entered values and select the Run the server as a Windows service checkbox.

- Click Finish.
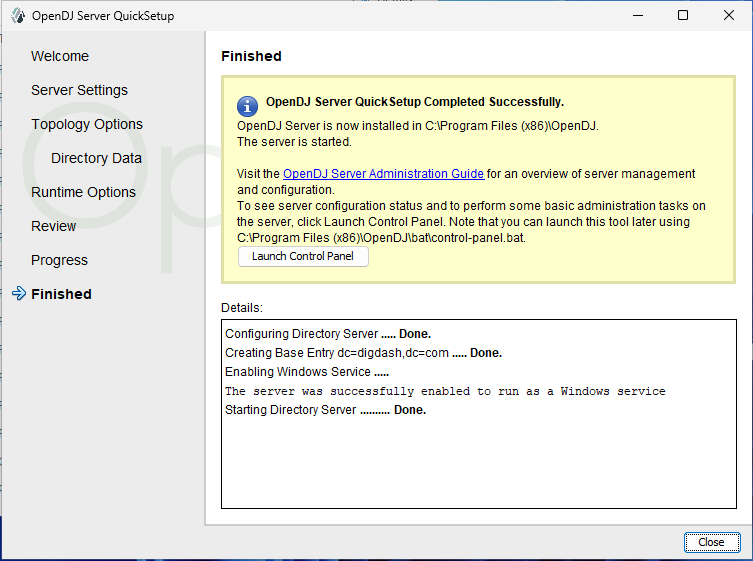
When the installation is finished, check if the service is started. Then launch an administrator terminal for additional settings.
Additional settings
- Open the OpenDJ installation directory.
- LDIF files can be downloaded by clicking on the following link : .
- Create the organizations using the “neworganization.ldif” file below
objectClass: organizationalUnit
ou: default
- To create a password checker:
- Use the dsconfig.bat command, then log in with the Directory Manager credentials and accept the certificates.
- Go to menu 29 then select “create a new Password Validator” > select “Character Set Password Validator” > enter “Custom Character Set Password Validator” > “true” > “true” > then configure 4 character-set as follows:
1:ABCDEFGHIJKLMNOPQRSTUVWXYZ
1:0123456789
1:!"#$%&'()*+,-./:;\<=>?@[]^_`{|}~
➡ The result should look like this: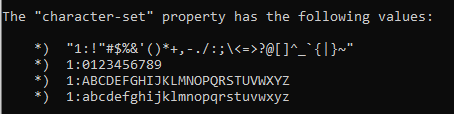
Once the configuration is complete, “finish” and exit “dsconfig”.
- For the second password checker, we can use a command line because it does not contain special characters:
- Apply both password checkers:
- Set the password policy for users using the “ppolicy.ldif” file below :
objectClass: top
objectClass: subentry
objectClass: pwdPolicy
cn: ppolicy
pwdAttribute: userPassword
pwdAllowUserChange: TRUE
pwdCheckQuality: 1
pwdExpireWarning: 600
pwdFailureCountInterval: 30
pwdGraceAuthNLimit: 5
pwdInHistory: 5
pwdLockout: TRUE
pwdLockoutDuration: 900
pwdMaxAge: 0
pwdMaxFailure: 5
pwdMinAge: 0
pwdMustChange: FALSE
pwdSafeModify: FALSE
subtreeSpecification: {base "ou=users", specificationFilter "!(uid=admin)" }
- Set a second password policy for the admin using the “ppolicy-admin.ldif” file below
objectClass: top
objectClass: subentry
objectClass: pwdPolicy
cn: ppolicy-admin
pwdAttribute: userPassword
pwdAllowUserChange: TRUE
pwdCheckQuality: 1
pwdFailureCountInterval: 30
pwdGraceAuthNLimit: 5
pwdInHistory: 5
pwdLockout: FALSE
pwdMaxAge: 0
pwdMinAge: 0
pwdMustChange: FALSE
pwdSafeModify: FALSE
subtreeSpecification: {base "ou=users", specificationFilter "(uid=admin)" }
- Change the password policy to allow pre-encoded passwords (useful for restores in digdash).
- Create an admin user for digdash via the “create_user_admin.ldif” file below:
objectClass: shadowAccount
objectClass: inetOrgPerson
cn: Admin Domain Default
sn: Default
uid: admin_default
- Assign the admin user the necessary rights using the “add_admin_right.ldif” and “add_admin_right2.ldif” files below:
changetype: modify
add: aci
aci: (target ="ldap:///ou=default,dc=digdash,dc=com")(targetattr = "userpassword || shadowlastchange")(version 3.0; acl "allow write on userpassword and shadowlastchange for admin"; allow(write) (userdn = "ldap:///uid=admin,ou=default,dc=digdash,dc=com");)
aci: (target ="ldap:///ou=default,dc=digdash,dc=com")(targetattr = "userpassword || shadowlastchange")(version 3.0; acl "allow read,write on userpassword and shadowlastchange for auth users"; allow(read) (userdn = "ldap:///all");)
aci: (target ="ldap:///ou=default,dc=digdash,dc=com")(targetattr = "userpassword || shadowlastchange")(version 3.0; acl "allow read on userpassword and shadowlastchange for anonymous"; allow(selfwrite) (userdn = "ldap:///anyone");)
aci: (target ="ldap:///ou=default,dc=digdash,dc=com")(targetattr = "*")(version 3.0; acl "allow write on * for admin"; allow(all) (userdn = "ldap:///uid=admin,ou=default,dc=digdash,dc=com");)
aci: (target ="ldap:///ou=default,dc=digdash,dc=com")(targetattr = "*")(version 3.0; acl "allow read on * for anonymous"; allow(read) (userdn = "ldap:///all");)
changetype: modify
add: ds-privilege-name
ds-privilege-name: config-read
ds-privilege-name: password-reset
- Generate a password for the administrator and remember it for later:
Useful option
The operation below is not part of the installation.
However, it may be useful to know it for later use.
Extending the limit for LDAP searches
It is possible to extend the LDAP search limit to more than 1000 users with the “extend_search_limit.ldif” file below.
changetype: modify
add: ds-rlim-size-limit
ds-rlim-size-limit: 10000
Installing MariaDB
The MariaDB database will be used to store the following elements: comments, audit data and data entry.
This database is more durable than an H2 database, that is why we recommend its use. If you already have a database that Digdash can write to and read from then proceed to the configuration step.
PostgreSQL and MySQL are also compatible.
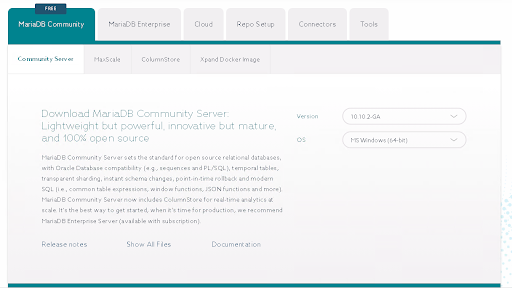
Running the installer
- Access the website https://mariadb.com/downloads/ and download the latest version of the software for OS: MS Windows (64-bit).
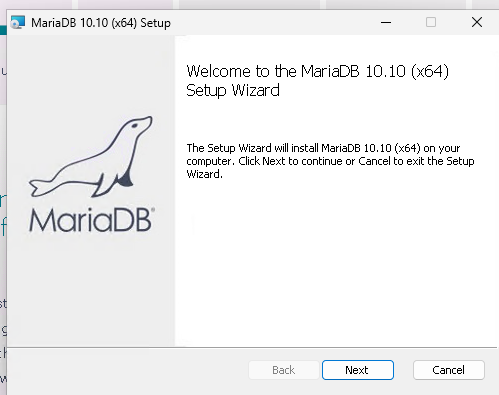
- Run the .msi file to start the installation and click Next.
- Choose the database root password:
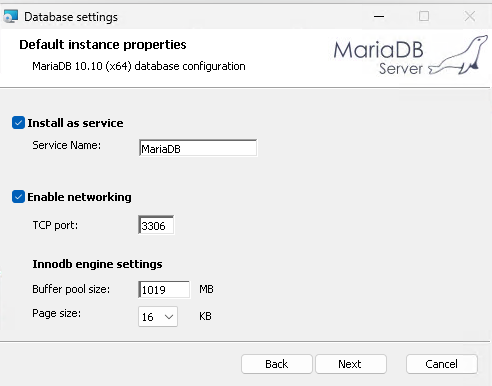
- Click Next and install MariaDB.
- Check the security of the C:/Program Files/MariaDB 10.10 folder to only give the following rights to users: Read and execute; List folder contents; Read.

Database configuration
- Open command prompt as administrator and launch MariaDB.
mariadb.exe -u root -p

- Create the necessary databases domain_module (domain examples: default, dev, prod)
CREATE DATABASE default_comment;
CREATE DATABASE default_ddentry;

Creating users and assigning rights
- Create a user for each database domaine_user_module:
CREATE USER 'default_user_ddaudit'@'localhost' IDENTIFIED BY 'mynewpassword';
CREATE USER 'default_user_comment'@'localhost' IDENTIFIED BY 'mynewpassword';
CREATE USER 'default_user_ddentry'@'localhost' IDENTIFIED BY 'mynewpassword';
- Assign rights to the user on databases:
GRANT ALL PRIVILEGES ON default_ddaudit.* TO 'default_user_ddaudit'@'localhost';
GRANT ALL PRIVILEGES ON default_ddentry.* TO 'default_user_ddentry'@'localhost';
MariaDB Update
For a minor update (for example, 10.10.1 to 10.10.2), you have to :
- Read the release note of the new version to ensure that there is no need to worry about the data.
- Download the new version (example: 10.10.2) and run it : the update should be done automatically.
- Restart MariaDB server.
Configuring DigDash after installation
Starting Digdash
- Restart the Tomcat Service.
- Open the Tomcat installation directory (\Apache Software Foundation\Tomcat 9.0\bin\Tomcat9w.exe), then double click the Tomcat9w.exe file, click Stop and Start.
- Check the war deployment in the installation folder E:/digdash/webapps/default.
- Access DigDash homepage at the following address : http://localhost:8080/adminconsole
The login/password is admin/admin.
Connecting Digdash to the installed OpenDJ server
Open http://localhost:8080/adminconsole/, Configuration -> Server settings -> Servers -> LDAP Server.
- Port: 389
- User: uid=admin, ou=default,dc=digdash,dc=com
- Password: OpenDJ admin password
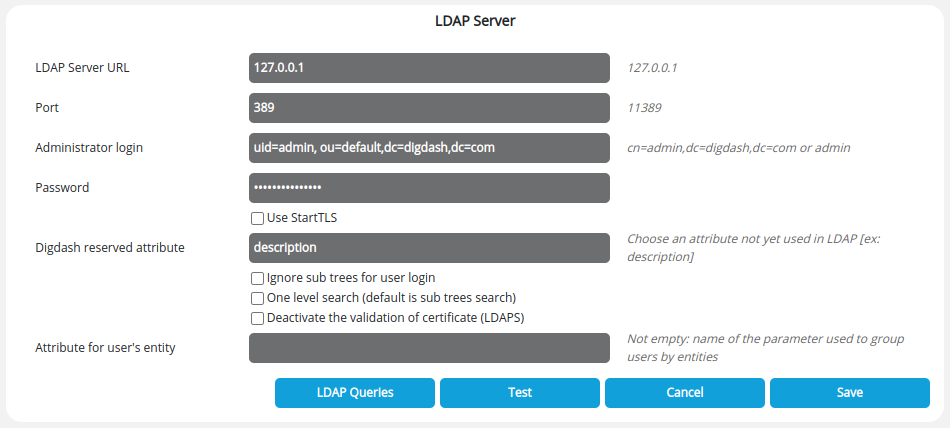
Then click the LDAP Queries button and fill in the fields as below:

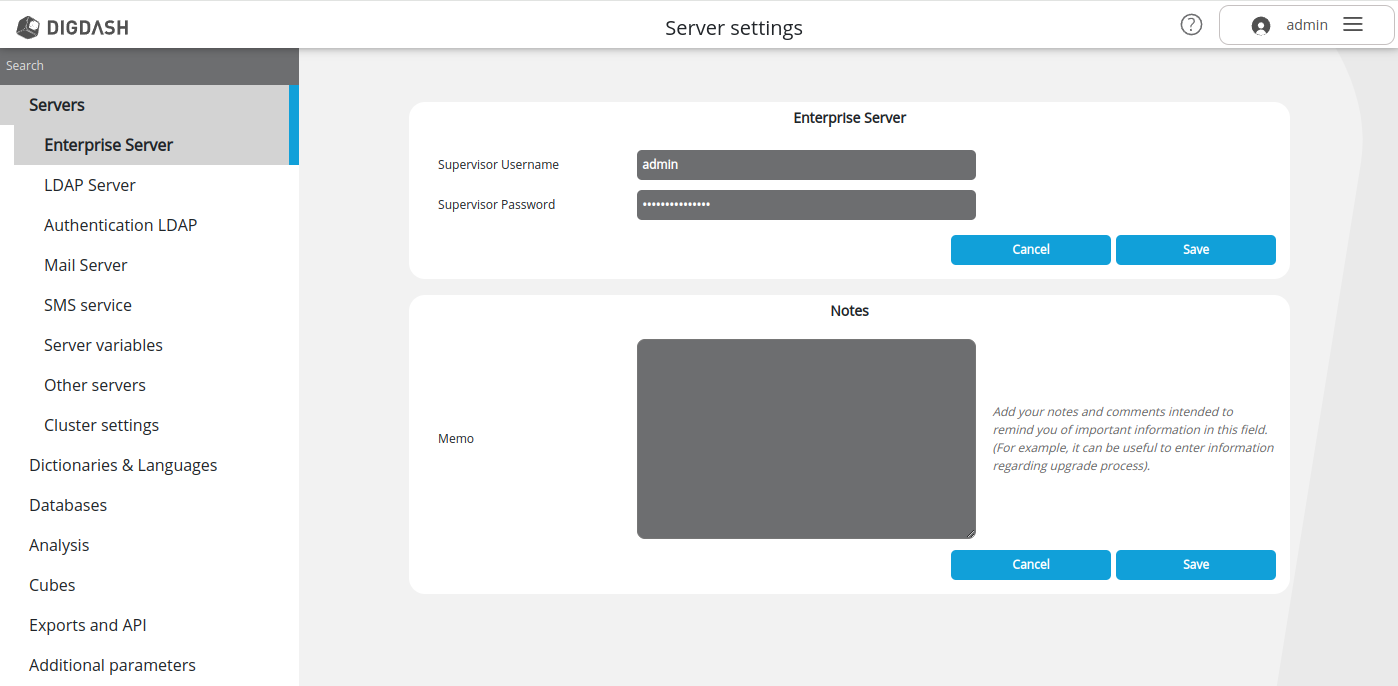
Changing the supervisor password and creating the LDAP account
Changing the supervisor password
Open Configuration -> Server settings > Servers -> Enterprise Server and enter a new password in the Supervisor Password field.
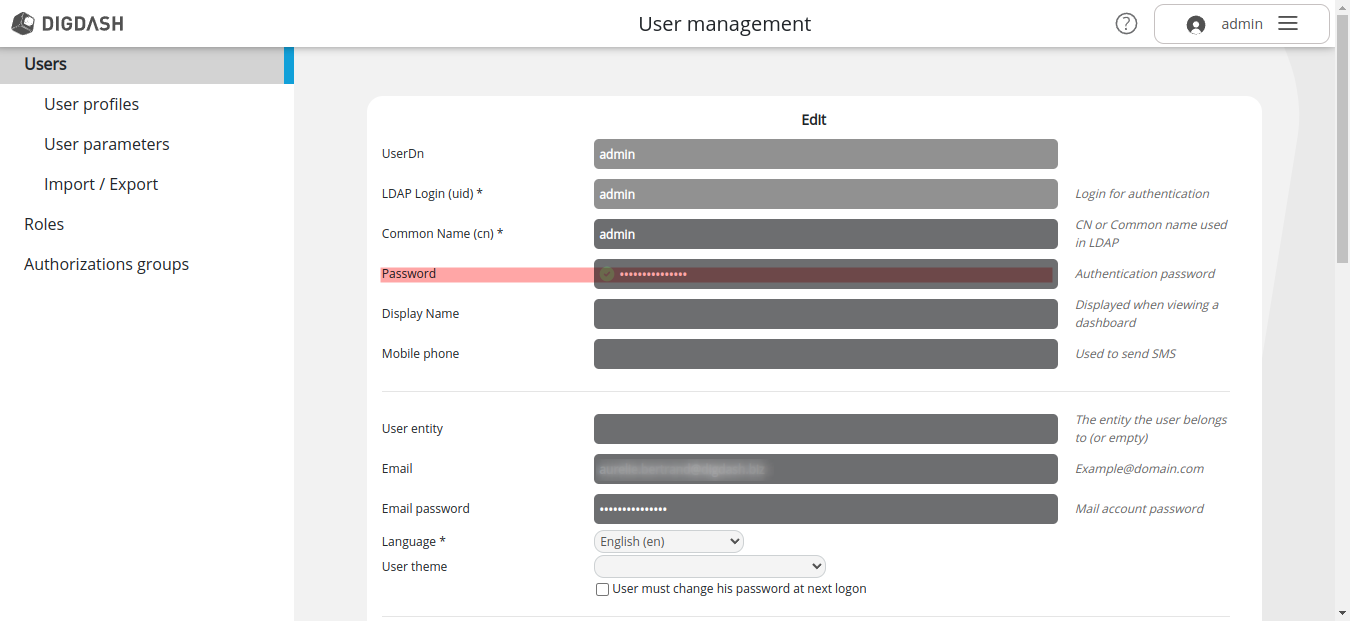
Creating the LDAP account
- Open Configuration -> User management -> Users.
- Create a new admin user and assign him all roles and authorizations groups.
- In the Password field, enter the new supervisor password defined above.
Database configuration
Audit data database
Open Configuration -> Server settings -> Databases -> Audit data and enter the URL, user and password.
URL : jdbc:mariadb://localhost:3306/default_ddaudit
This solution makes it possible to secure access to the audit database.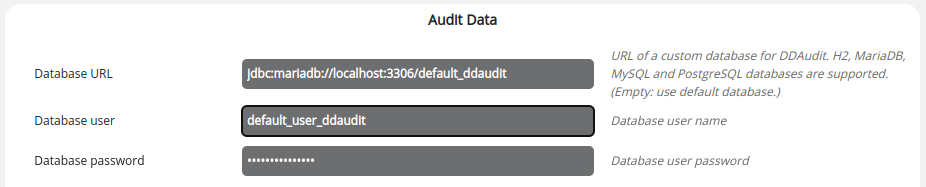
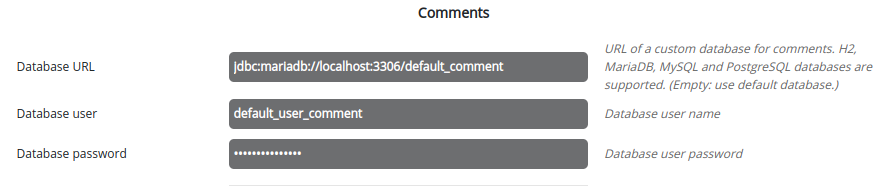
Comments database
Open Configuration -> Server settings -> Databases -> Audit data and enter the URL, user and password.
URL : jdbc:mariadb://localhost:3306/default_comment
This solution makes it possible to secure access to the comment database.
Data entry database
Open Configuration -> Server settings -> Databases -> Data entry and enter the URL, user and password.
Select the Enable data entry checkbox and select a database in the drop-down list below.

You must first have created a connection to the database from the Data connection manager in the Studio.
Enter default.user.ddentry for the user and password defined in the previous step.
The name defined in the Login Name field is the one that will appear in the database selection drop-down list.
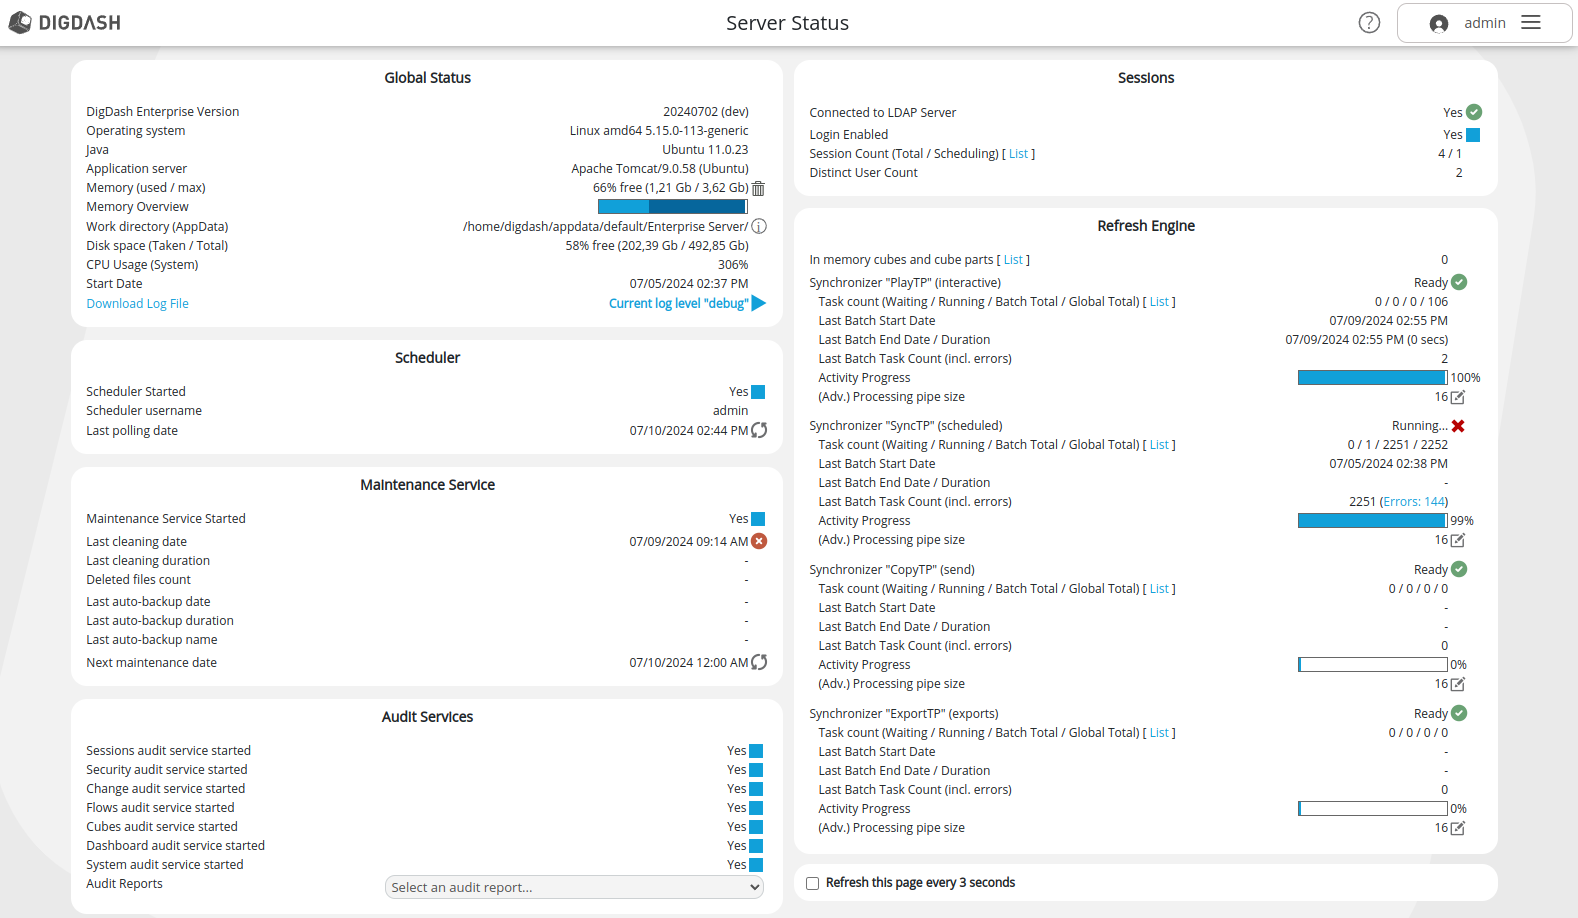
DigDash Services
Open the Server status page : http://localhost:8080/ddenterpriseapi/serverstatus?adminDomain=adminconsole&serverDomain=ddenterpriseapi.
Check that the DigDash services are activated and that the maximum memory is well adapted to the capacity of the server, you must leave at least 4 GB for the system.